Each web site created under a parent site is called a “subsite” or website. Each subsite can be a top level website (e.g. department website) which can have multiples subsites, down as many levels as users need.
To create a new website:
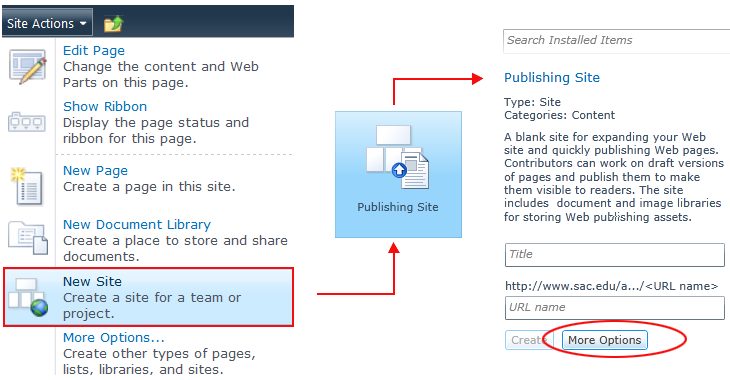
- Select
New Site from
Site Actions
- Select
Publishing Site
- Click on
More Options

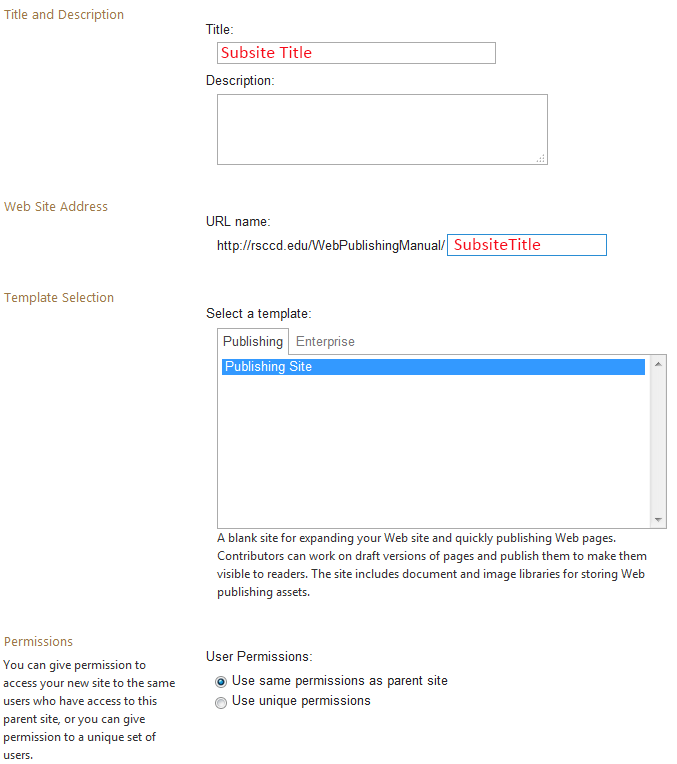
- In
Create window, enter
Site Title and
URL (follow naming convention)
- Keep default permissions (Use same permisisons as parent site)
You can break parent permisisons inheritance later if needed. - Click
Create

Go back to the parent site and select
Site Actions >
View All Site Content. The new site appears under
Sites and Workspaces.
Each subsite
- possesses all the features of a parent site
- can inherit its parent permissions or have its own
- can show parent navigation links or only its own navigation
- can be made public or private
When it is private, only permitted users have access
Pages Library Settings
- Open the
Pages library and select the
Page tab on the ribbon
- Click on
Library Setttings on the right hand side of the ribbon

- Under
General Settings, select
Versioning Settings to open the
Pages Library Settings page.
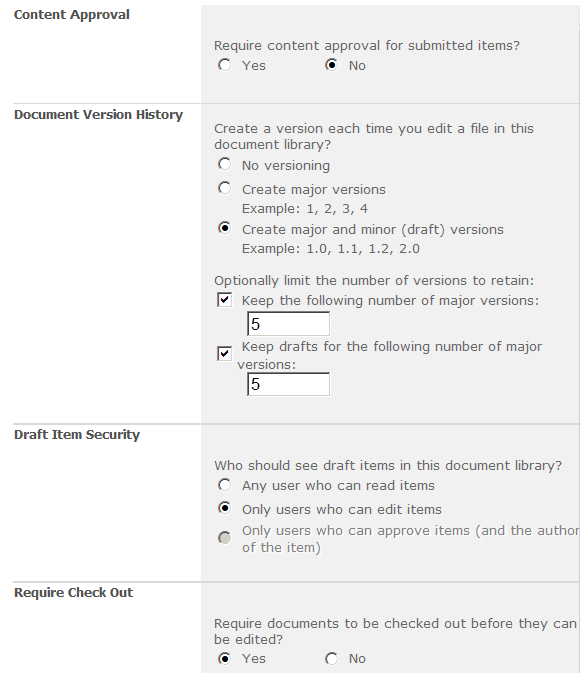
-
Content Approval is disabled by default. The
No option should be checked.
Note: If your site is assigned to a contributor and needs the site owner's approval to publish a page, you can enable the content approval by checking
Yes. -
Document Version History
Set the number of major and minor versions you want to keep. -
Required Check Out
Check
YES - to prevent multiple people from making changes at the same time.
- so team members can add a comment to keep track what has changed in each version.
- to enable the"Discard Check Out" option, which allows you to discard the changes you have made to your checked out version.
Note: You can override a page checked out page by another user, but this will override all the changes that user has made.
-
Pages Library Settings:


