Inserting a table
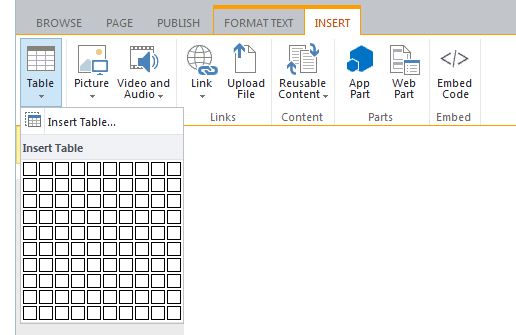
- Click on the
Edit tab
- Select
Insert Table
- Select the number of rows and columns

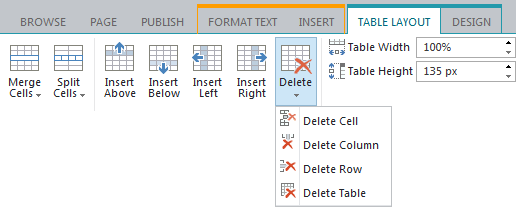
Table Layout Tools:
Select "TABLE LAYOUT" tab
- Delete cell, column, row, or whole table:
Select the element you want to delete, and then click on the corresponding option on the Delete dropdown.

-
Insert rows and columns
Select the row or column you want to insert a row or column next to it, and click on the corresponding option on the ribbon.

- Split and merge cells
- Split: Select the table cell to split, and then select the corresponding option on the ribbon
- Merge: Press the Shift key and select the cells to be merged, and then select the corresponding option on the ribbon
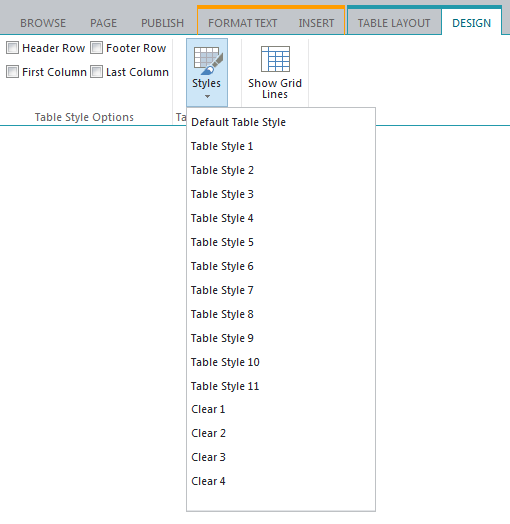
Table Design:
Click on DESIGN tab, and then select
a predefined table style.

The
Clear tables are used to line up text blocks or graphics in columns and rows. They have no borders.
Options to display column and row headers:

Table sizing
- Use relative values (percentages) rather than pixels.
- Defining cell height should be avoided so the table cell can expand downward to accommodate its content.
Accessible Data Table
Accessible data tables need to have either column headers or row headers, or both.
Read more about accessible data tables.

